Monday, October 27, 2014

Harvest Monday 27 October 2014


Kale


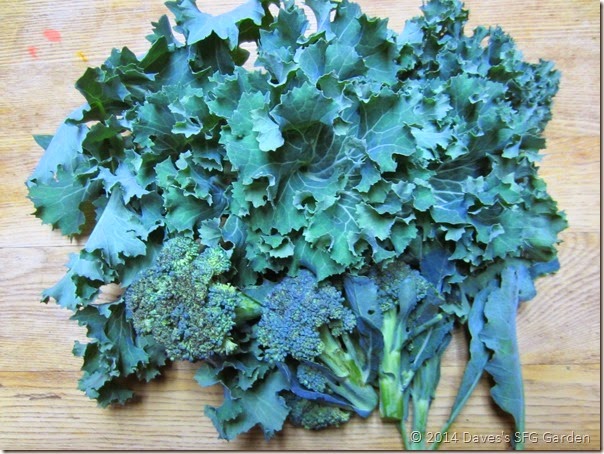
There is not much left in the garden except some hardy greens and a few broccoli sprouts. I am still cleaning up the beds and getting them ready for winter. I planted the garlic last week since we were looking at a series of rainy days and I wanted them in before the deluge. Not much rain actually happened and we are having an amazingly mild fall. Weather this week is supposed to be mostly sunny with temperatures ranging 50- 60s °F/10-15 °C.


Oktoberfest


I spent a cloudy and blustery Sunday afternoon at Nashoba Valley Winery for their Oktoberfest/Blue Grass Festival. The band was Southern Rail and they are very good. It was a sell-out crowd but luckily I got there early enough for a good seat. And fortunately the crowds left me a clear path back to the beer tent and the pulled pork booth. Besides the winery, Nashoba Valley also runs a microbrewery and a distillery, so there was plenty of spirits of every kind and I tried several of their microbrews.


That is all from my garden. To see what other gardeners around the world are doing in their gardens, head over to Daphne’s Dandelions, our host for Harvest Monday.

Thursday, October 23, 2014

Garlic Planting 2014

It’s time to plant the garlic. This year I am ahead of myself. It’s only mid-October and I actually got it all planted. A couple of days ago I prepped the beds, pulling summer plants and weeds, then adding compost and fertilizer. This year I added a lot of organic compost (McEnroe’s, since I am out of my own). I also added rock phosphate, bone meal, and a general organic fertilizer (Tomato Tone, since I have a large bag of it).
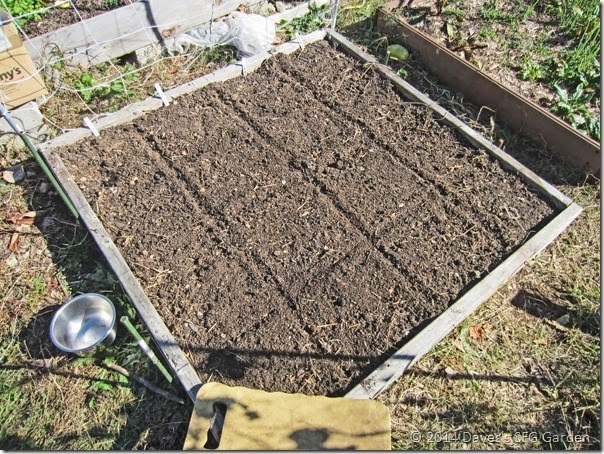
 

Prepared_Bed


The bed above  was home to the bush beans this year, plus a row of cucumbers, so hopefully the beans helped fix some nitrogen in the soil. The amendments were blended in and the bed smoothed out. You can see the square foot markings I made to guide planting. This 4x4 foot bed has sixteen squares. I will be planting a row of four squares of four types of garlic.


Spacing


I am using a spacing of 4 cloves per square this year, hoping to maximize bulb size. That gives a spacing of 6 inches in each direction. The official recommendation is 9 per square but I think that is going to affect size. I have used 5 and 6 in the past but this year I am going with 4 per square and hoping for large heads of garlic. Anyway, 64 heads from this bed is already a lot of garlic.
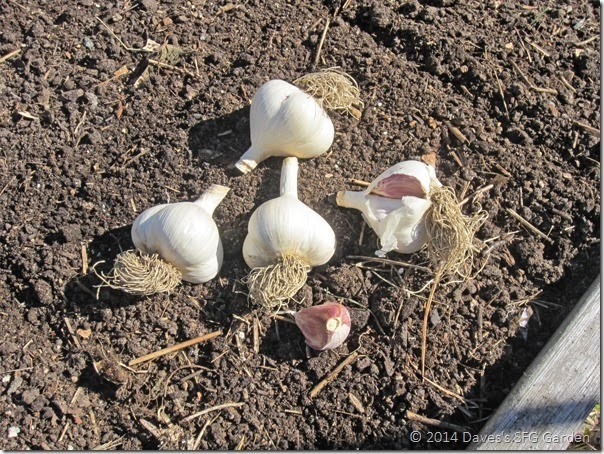
 

German_Red


First in the ground, above, was the German Red rocambole garlic I bought last month at the Mount Desert Island Garlic Festival in Southwest Harbor. It was grown by Goosefooté Garlic in Irasburg, Vermont, who made the long trek to MDI for the festival. The heads were enormous with just four huge cloves per head. I purchased four heads so I had enough to plant four squares. Forget the dibble, you need a post hole digger to plant this garlic.


Dujanski


Next was another new garlic, Duganski, a purple stripe from Territorial. For planting I selected the best looking and largest of the cloves from the four heads I received. I documented before why I was not real happy with this shipment of garlic.The sheaths of a lot of the cloves were also loose, as you can see on the bottom cloves in the photo above. Anyway, I found enough decent cloves to plant my 4 squares and I hope the results are good.
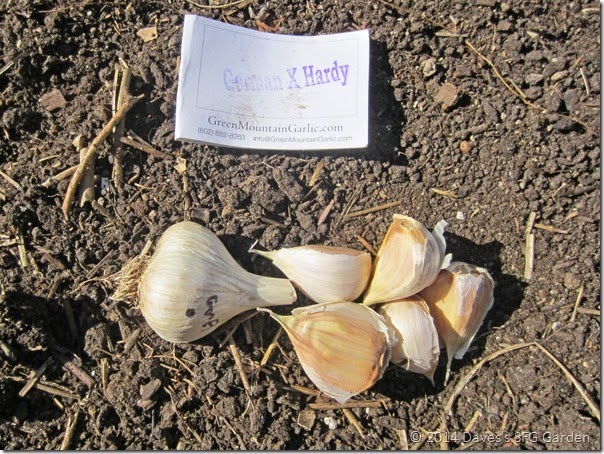
 

German_Extra_Hardy


Next was German Extra Hardy, my own seed garlic from this year. Last year I was disappointed at planting time that the heads I set aside were soft and the cloves were turning yellow. This year the seed garlic I set aside was fine and the cloves were firm.  Last year I had to discard enough cloves I only had enough for 3 squares, but this year I succeeded in planting 4  squares. So hopefully last year was an anomaly. I thought the bulbs I harvested this year were smaller but in separating cloves for planting, the individual cloves are quite large, so I am hoping for big heads next summer.
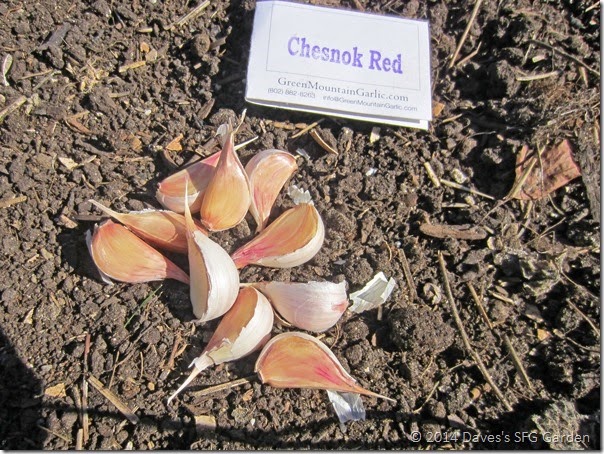
 

Chesnok_Red


Finally for this bed, I put in my own Chesnok Red seed garlic, another purple stripe. This garlic has grown well for me and also keeps well. I think, again, that heads were a little smaller this year  than the year before, but it’s a new year and I have great expectations from this one.


Mulched_garlic_bed


After planting the garlic, I mulched the bed with chopped straw. I really like this material, made for landscapers for seeded lawns. The brand I used here is called Mulch Master. The straw is chopped so individual pieces are small, making it easy to spread around under existing plants. It is heat sterilized to kill weed seeds and I have never had a problem with weeds using it. It is light, doesn’t mat up and it quickly decomposes by the end of the season. The mulch will help protect the garlic cloves from heaving this winter when the beds go through all the freeze/thaw cycles.
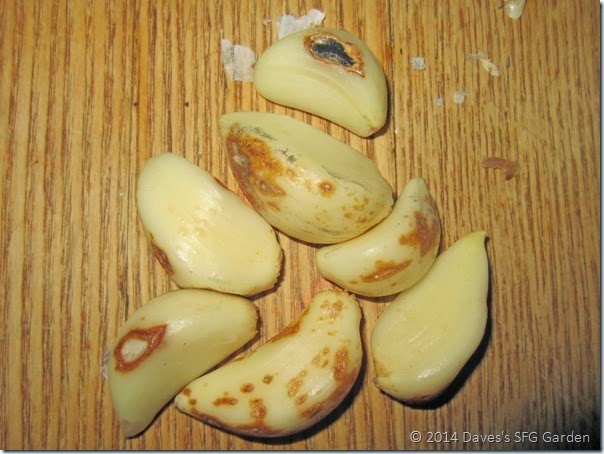
 

Diseased_cloves


Finally, I headed home with all the unused cloves from my seed garlic, planning to freeze or dry the unused cloves. What a surprise when I started removing the skins from some of the cloves. I believe the garlic cloves above were from the Duganski heads. All  of these were promptly discarded, while a few with one or two small spots were used after the spots were removed. Trying to figure out what these spots were, all I can come up with is these cloves are infected with Fusarium, also known as garlic basal rot. Notice that the color of the cloves is also yellowish when they should be white. Nice. So I just planted a row of diseased garlic in my bed, and that does not make me happy. Anyone have another, more hopeful, opinion on what these spots are?


Here is another question for those more experienced with garlic than I. Can you/do you plant garlic cloves without their sheaths? A lot of the sheaths were loose on some of the garlic, or were stuck to the neighboring clove and stripped when I separated the cloves. Those I took home to use. But in addition, if you want to avoid planting diseased cloves like those above, you have to remove the skins to see if the clove inside is healthy. I did not know these were affected or I would certainly not have planted them. Anyway, I am hoping for the best but moderating my expectations.
Monday, October 20, 2014

Harvest Monday 20 October 2014


Greens


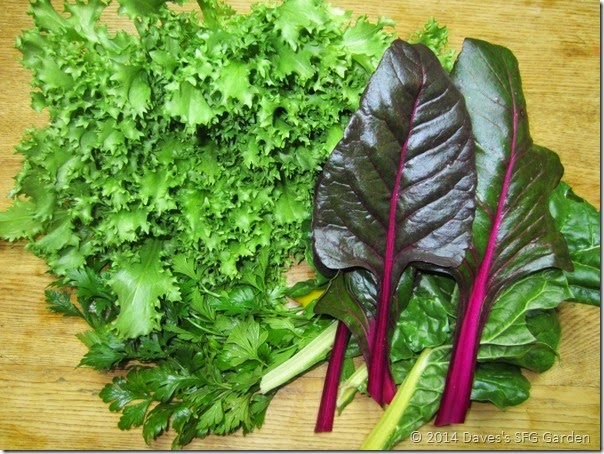
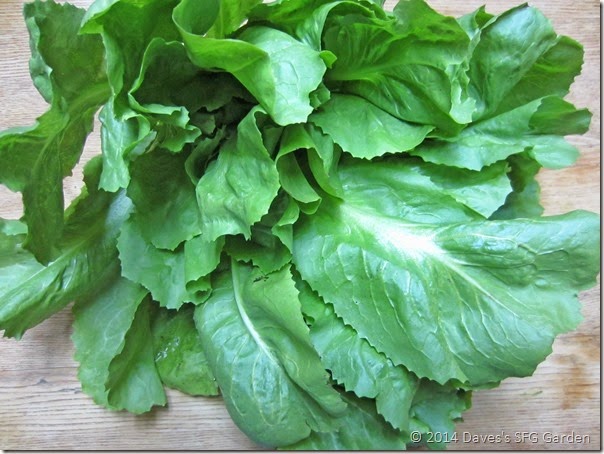
Harvests are getting slimmer and after a couple of nights near freezing, will be even more so. I picked a nice head of endive, although not blanched as well as I would like. I have more of that and escarole still in the garden and it if slightly frost tolerant. The Swiss chard is recovering from a case of Cercospora leaf spot and I am starting to get some useable leaves. It is amazing how the color of the Magenta Sunset chard has deepened with the arrival of cooler weather. This is the chard that knocked me over when I saw it in the demonstration kitchen garden at Tower Hill. Unfortunately chard doesn’t do well in freezing weather because if its high water content.


Peppers


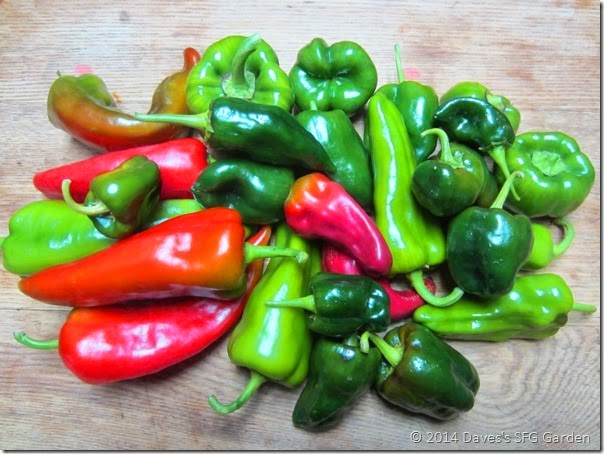
The pepper plants have dropped most of their leaves and with possible freezing temperatures arriving, I decided to pick all of the remaining peppers, resulting in this haul. At least I managed to get a few more of the Carmen peppers to ripen. I now have a large batch of them to try roasting this week. I have to figure out what to do with the rest of the peppers. I will dehydrate some of them and maybe a pepper relish for the rest.

 Hot_Sauce_Peppers


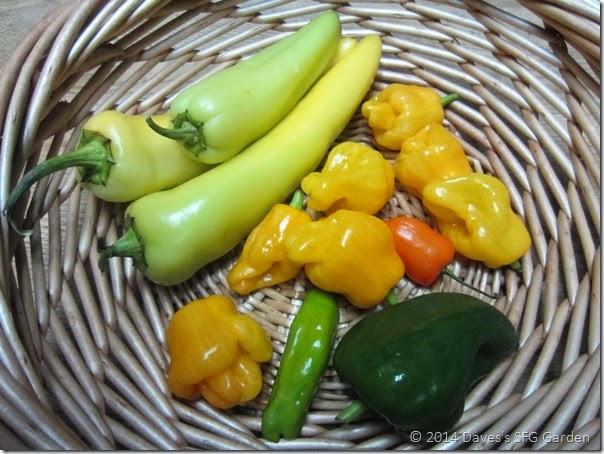
I did find some yellow banana peppers at the store to add to my Trinidad Spice peppers for a batch of hot sauce using Dave’s recipe. I also threw in a small Poblano, an orange Habanero, and a Shishito. The result is actually green not yellow and is still fermenting. It smells nice, not too hot.


That is what I harvested last week. To see what other gardeners around the world are harvesting, head over to Daphne’s Dandelions, our host for Harvest Monday.

Monday, October 13, 2014

Harvest Monday 13 October 2014

Not much is left to harvest except some of the Fall greens. We have had overnight temperatures in the low 40s °F (4 °C) which is shutting down most of the warm weather crops even without a frost or freeze. And given our latitude, the days are shortening and the sun is lower in the sky, so by afternoon it is below the woods to the west of the garden, casting the garden into shade. With these conditions, you can’t really expect to get anything growing at this time of year. Any fall crops you want to grow will have to be started and in the ground by at least August, when it is hot and dry, if you hope to have a Fall crop.


Veggies


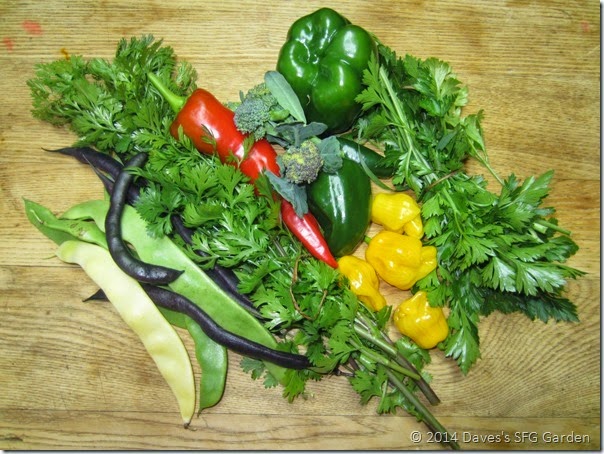
That said, above is what I managed to salvage from the garden. The bell pepper gave me enough to do a batch of stuffed peppers. The cilantro is a second growth from volunteer seeds, always nice to have. If I had planted seeds I guarantee they would refuse to germinate. All my parsley which poked along during this dry summer has perked up and is loving the cool weather. And all of the Trinidad Spice/Perfume peppers ripened so I picked all of them. I now have enough to try making a batch of fermented “hot” sauce. If I can find some yellow Hungarian wax peppers, I will include them, the small Poblano above, plus perhaps a single orange Habanero pepper, to make a yellow semi-hot sauce.


Garden cleanup continues. Next week the garlic gets planted, after a fairly heavy Saturday rain. The main bed for them is cleared but needs to be composted and fertilized.


That is what I rescued from my garden this week. To see what gardeners around the world are doing, visit Daphne’s Dandelions, our host for Harvest Monday.

Monday, October 6, 2014

Harvest Monday 6 October 2014

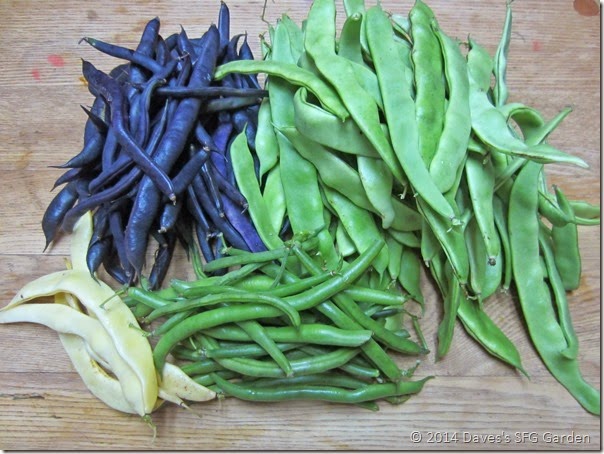
Last week I started the garden clean up process. I decided time to pull the bush beans because I need that bed for planting garlic. Turns out the beans are not ready to give up just yet. The Provider beans were kaput but I got a good picking from Jade which provided a meal for us that night. In addition I got an even bigger pile from the pole beans. The Musica beans were still cranking, although the cold nights are finally shutting them down. I got a few more Gold Marie beans but they are now finished and many of the pods have been damaged by some pest feeding on them. Surprisingly, the Violetto beans are putting on growth and flowering for a third time. If I just had a longer growing season, they would be a very productive bean.


Beans


I am puzzled by the pest that is feeding on the beans. I was expecting to find some green stink bugs, which like to drill into the pods, but so far have not found any. I did spot a couple of small, narrow black insects crawling around the Musica beans, which also have suffered some damage. Unfortunately, they had vanished by the time I fetched my camera. These things were not bug shaped nor beetle shaped. The body was sort of wasp shaped but with no apparent wings. The body was black with no apparent markings. They did not look like tarnished plant bugs. I have checked photos of bean pests online and have not found a match. I hope I can get a photo of them because I would like to know what I am dealing with.


Tomatoes


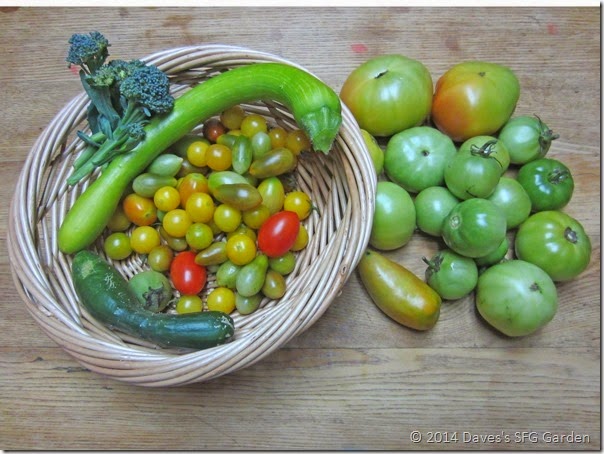
Next up was pulling the tomato plants. I got a lot of green tomatoes for the effort and made a batch of refrigerator pickled green tomatoes. When pulling the tomatoes out of the raised beds, I had to be careful not to damage the peppers in the next row. Because of the loose, friable soil in the beds, the tomato roots like to roam the neighborhood and make themselves at home. Next year I have to reconsider what I put in the squares next  to the tomatoes. I may go back to planting shallower rooted plants like the onions in those squares.


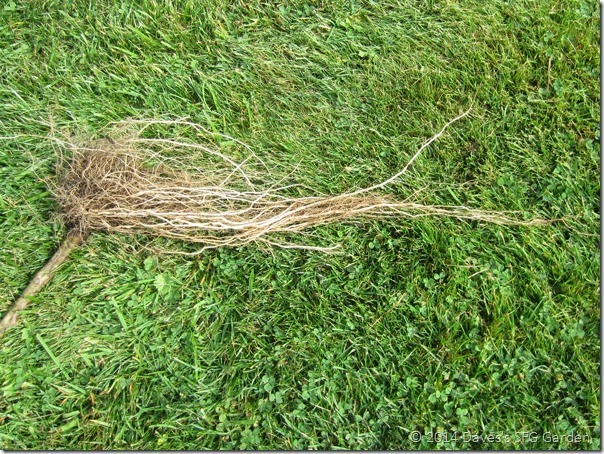
Sunkist_roots


The plant above is a Sunkist tomato from a raised bed. You can see the length of some of the roots. Most of the very longest roots seem to have grown from the top of the root ball at the base of the stem. This pretty well illustrates the advantage of planting the tomatoes deep enough to bury some of the stem. And of course, the beds are only 8 inches deep so going down is not an option.


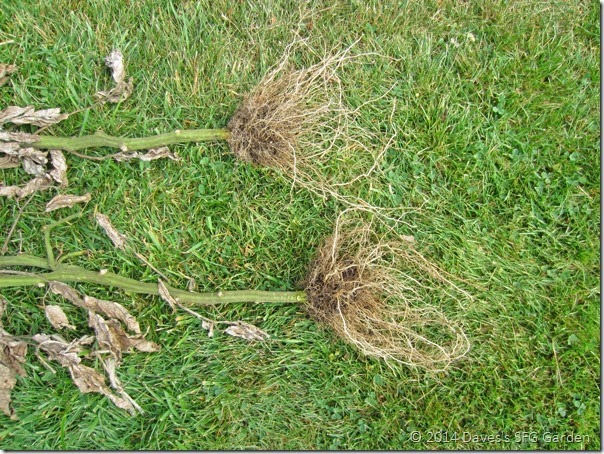
Brandywine_roots


Next I pulled the tomatoes that were planted in-ground in my extra garden plot. Those tomatoes did very well this year compared to the plants in the raised beds, and despite fairly poor soil. So I was curious to see what their root structures looked like. The two plants above are Brandywine and the root balls are probably about the same size as the Sunkist but without the really long roots. Apparently the roots found everything the plants needed in their own backyard and didn’t have to go roaming. At this point I realized I should have photographed the Sunkist and Brandywine root balls side by side, but the Sunkist was already buried deep in a trash bag of tomato plants and rotten tomatoes and I was not putting my hand in there.


Peppers


The Carmen peppers have finally started to ripen. I got a large set of fruit on the two plants in the in-ground garden but they were taking their good old time ripening. How do you tell a pepper the clock is ticking and frost is on the way? I also picked some more Trinidad Spice peppers and have another five on the plant in various stages of ripening. 


Escarole


I tried to harvest a single head of escarole from the August planting and wound up with two. Since I planted them farther apart than usual, they have kind of flopped on the ground so the leaves are entirely green. The first one I tried was kind of tough. I need to tie them up into heads so the center of the head blanches. Amazingly there was not a single spot of slug or earwig damage to these heads.


That’s what came from my garden last week. To see what other gardeners around the world are harvesting from their gardens, check out Daphne’s Dandelions, our host for Harvest Monday.

Template developed by Confluent Forms LLC